

In this tutorial we will take the responsive website we have built in the previous tutorials and implement it into WordPress. WordPress is a web blog system which was originally created to be able to easily write flexible and adaptable blog posts. In the course of years the range of functions enlarged more and more so that we can now use WordPress not only for blogs but also as a Content Management System for “normal” websites. The advantage of WordPress over most of the other Content Management Systems is that it is easy to handle and understand, it can be adapted to your needs with thousands of plugins and it has a huge community which is willing to help you if you ever encounter problems. If you have already created a website and would like to use a CMS it is very easy to implement the website into WordPress. So let´s start!
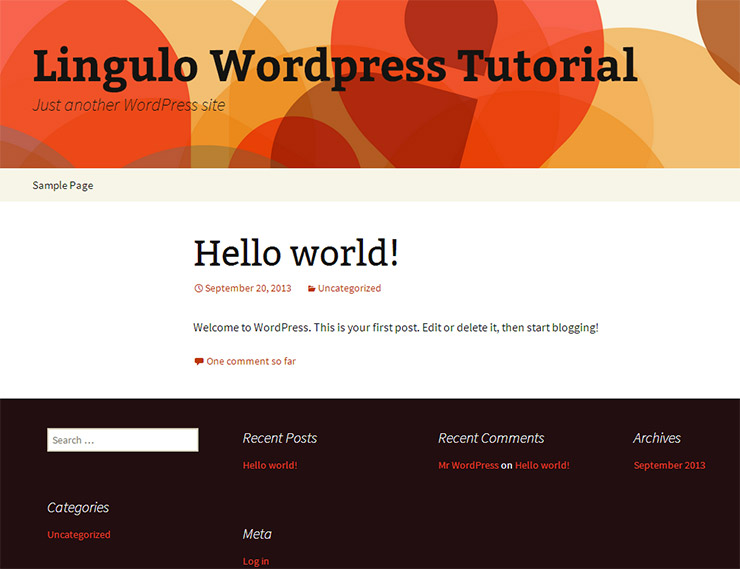
Before we can begin to create a WordPress template you need to install WordPress on your web server. To do so download the WordPress package from the official website (English, German) and follow the 5-Minute install. If your installation succeded you should be able to see a basic blog with some pre-defined content similar to the following image.
In order to create our own design and layout we will now build a new template. Open your FTP program and find the folder “wp-content/themes/”. In this folder WordPress will store all the different templates which you can then activate in the administration area of WordPress. To create a new template let´s add a new folder “lingulo” inside “wp-content/themes/”.
Implementing an existing design is fairly easy in WordPress, in a first step we simply copy all the files we have created before into the “lingulo” folder. We will afterwards modify some of these files and add some further files to integrate the website design into WordPress. Please note that the style.css needs to be located in the same directory as the index.php file. Now that you have copied all the files you need to change the file type of our index file to php. Simply rename our index.html file to index.php and copy it to the server. Then we need to add a specific comment to our style.css file. The comment will tell WordPress the name, the author, a short description etc. of our template. Simply open your style.css file, add this to the very top of the file and change the values as you like. For more information and a full list of possible tags visit this site.
/*

Theme Name: Lingulo

Theme URI: http://www.lingulo.com

Description: Template to the WordPress tutorial on http://www.lingulo.com

Author: Christoph Anastasiades

Author URI: http://www.lingulo.com

*/
Upload the style.css file to your server and overwrite the existing style.css file. We now have already created a new template which we can activate in the dashboard of WordPress. To get access to your dashboard simply type /wp-admin behind the URL where you have installed WordPress to. So for example if WordPress has been installed to “http://www.lingulo.com/tutorial-content/wordpress/” then you should access the dashboard by going to “http://www.lingulo.com/tutorial-content/wordpress/wp-admin”. After visiting that page you might be asked to enter your username and password which you have set in the installation process. When you have entered the dashboard go to “Themes” by clicking on “Appearance->Themes” in the left column. You will probably see that “Twenty Thirteen” is the template which is currently activated. You should also see our new template “Lingulo” in the list of available themes. Click “Activate” to activate our new template. When you visit your page now you will see plain text without any styling. Don´t be sad about it, the reason is that all the included stylesheets and js files are not found as they are located in a different folder (they are located in “http://www.lingulo.com/tutorial-content/wordpress/wp-content/themes/lingulo/”). To fix this problem we will now start adapting our index.php file and create some new files.
In WordPress we need to distinguish between posts and pages. When you write a blog then each of the blog posts would be a WordPress post. By default posts appear in chronological order on the home page. A WordPress page usually contains timeless information, for example a contact page or an “about me” page. My blog Lingulo is also made with WordPress, each of my blog entries is a WordPress post while the other pages like “About”, “Participate” or “Disclaimer” are made with WordPress pages.
Let´s start adapting our index.php file to make the website appear just like in the previous tutorial. In WordPress we need to remove our head part and our footer from the index.php file and put them in separate files. The header.php file contains the head part of our website. Head part means that it should contain everything inside the head tag but can also contain the header of our website (e.g. a navigation which should appear on every page). In our case we would like to have the site name and tagline as well as the menu to be on every page so we simply cut everything from the beginning of the index.php file until the closing header tag and put it into a new file called header.php.
Well done! Now we need to add one more thing: imagine you install a new plugin which needs a specific script or a new CSS file to work. This plugin would need to be able to add scripts or CSS files into the head tag. In order to make this possible we need to tell WordPress at which point in our header.php file these scripts or CSS files should be included. To do so we simply add the function wp_head() just before the closing head tag.
As I have said before the reason that our website contained only plain text without any styling was that the paths to our CSS and JavaScript files are wrong. To fix these paths we add the function bloginfo(‘stylesheet_directory’) into every path. What this function does is giving you the path to the stylesheet directory. In my case this would be “http://www.lingulo.com/tutorial-content/wordpress/wp-content/themes/lingulo/”.
<!DOCTYPE HTML>

<html>

<head>

<meta charset="UTF-8">

<!-- SlidesJS Required (if responsive): Sets the page width to the device width. -->

<meta name="viewport" content="width=device-width, initial-scale=1.0">

<!-- End SlidesJS Required -->

<title>Some Page Title</title>

<link rel="stylesheet" href="<?php bloginfo('stylesheet_directory'); ?>/reset.css" type="text/css" media="screen" />

<link rel="stylesheet" href="<?php bloginfo('stylesheet_url'); ?>" type="text/css" media="screen" />

<link href="<?php bloginfo('stylesheet_directory'); ?>/lightbox/css/lightbox.css" rel="stylesheet" />

<link href='http://fonts.googleapis.com/css?family=Open+Sans|Baumans' rel='stylesheet' type='text/css'>


<script src="<?php bloginfo('stylesheet_directory'); ?>/js/modernizr.js"></script>

<script src="<?php bloginfo('stylesheet_directory'); ?>/js/respond.min.js"></script>

<script src="http://code.jquery.com/jquery-1.7.2.min.js"></script>

<script src="<?php bloginfo('stylesheet_directory'); ?>/lightbox/js/lightbox.js"></script>

<script src="<?php bloginfo('stylesheet_directory'); ?>/js/prefixfree.min.js"></script>

<script src="<?php bloginfo('stylesheet_directory'); ?>/js/jquery.slides.min.js"></script>


. . .
. . .
. . .

</script>

<?php wp_head(); ?></head>

<body>

<header><h1>Lingulo HTML5</h1>

    <p>A responsive website tutorial</p>

    <select id="alternative_menu" size="1"><option>Home</option>

        <option>Mitmachen</option>

        <option>Archiv</option>

        <option>Kontakt</option>

        <option>Datenschutz</option>

        <option>Haftungsausschluss</option>

        <option>Impressum</option></select>

        <nav><h2 class="hidden">Our navigation</h2>

            <ul><li><a href="javascript:void(0)">Home</a></li>

            <li><a href="javascript:void(0)">Porfolio</a></li>

            <li><a href="javascript:void(0)">About</a></li>

            <li><a href="javascript:void(0)">Contact</a></li></ul></nav></header>
Now let´s do the same thing for our footer. The footer.php should contain not only our ending body and html tags but also our footer tag since we want the footer to be similar on any page. Cut everything from our index.php file starting from the footer tag until the very end of the file (until the closing html tag) and put it into a new file called footer.php. Many plugins will not only add scripts into the head tag of our document but also just before the closing body tag. Due to that reason we have to tell WordPress where to put them just like we have done for the header.php. To do so add the function wp_footer() just before the closing body tag. Also note that when we include an image we need to use the function bloginfo(‘stylesheet_directory’) to ensure the path is correct.
<footer>
<h2 class="hidden">Our footer</h2>
<section id="copyright">
<h3 class="hidden">Copyright notice</h3>
<div class="wrapper">
<div class="social">
<a href="javascript:void(0)"><img src="<?php bloginfo('stylesheet_directory'); ?>/img/Social-Networks-Google-plus-icon.png" alt="google plus" width="25"/></a>
<a href="javascript:void(0)"><img src="<?php bloginfo('stylesheet_directory'); ?>/img/Logos-Tumblr-icon.png" alt="tumblr" width="25"/></a>
<a href="javascript:void(0)"><img src="<?php bloginfo('stylesheet_directory'); ?>/img/Logos-Youtube-icon.png" alt="youtube" width="25"/></a>
<a href="javascript:void(0)"><img src="<?php bloginfo('stylesheet_directory'); ?>/img/Social-Networks-Bebo-icon.png" alt="bebo" width="25"/></a>
<a href="javascript:void(0)"><img src="<?php bloginfo('stylesheet_directory'); ?>/img/Social-Networks-Xing-icon.png" alt="xing" width="25"/></a></div>
© Copyright 2012 by <a href="http://www.lingulo.com">Lingulo</a>. All Rights Reserved. Icons by: <a href="http://www.visualpharm.com" target="_blank">Visualpharm</a></div></section>
. . .
. . .
. . .
</footer>
<?php wp_footer(); ?>
</body>
</html>
Now that we have “outsourced” the header and the footer into separate files we need to include them into our index.php file. Go to the very top of your index.php file and add <?php get_header(); ?>. Then go to the very bottom and add <?php get_footer(); ?>.
Upload all files to your server and you should be able to see the site just like this.
Let´s make some changes to our header.php file now. Remove “Some Page Title” from the title tag and replace it with <?php wp_title(); ?>. What this does is adding the title of the post/page into the title tag. Visit the WordPress reference to find out more about how you can adapt the title according to your needs. You should also think about using a SEO plugin to optimize meta and title tags. As we would like to be able to change the website name and tagline from the admin section of WordPress we will now remove the text inside our main heading h1 and replace it with <?php bloginfo(‘name’); ?>. This will add the name of our website into the h1 element. To do the same thing with our tagline / subheading remove the text “A responsive website tutorial” and replace it with <?php bloginfo(‘description’); ?>. This will add the description of our website which we can set in the admin section of WordPress into the subheading.
<header>

   <h1><?php bloginfo('name'); ?></h1>

    <p><?php bloginfo('description'); ?></p>
. . .
. . .
. . .
We could use our template like this and it would work perfectly fine, we can create new posts and pages. The problem is though that until now using a CMS didn´t give us much of a benefit. All the contents are still static and can not be edited from the admin section. Also when creating new posts or pages they will look similar to the front page. At this point it is important to understand how WordPress chooses how a page or post should look like.
For posts WordPress looks for a file called single.php in which you can set how a post should be displayed. If this file is not found (which is the case right now in our tutorial) then WordPress will choose index.php to display posts instead.
For pages WordPress will search a file called page.php. However before choosing that file for a page WordPress will first look for another file. As you can imagine you will have lots of pages and they should not all look alike. You can of course change a lot simply by using the WordPress editor, you can add images or forms and even add HTML code to a page only by using the editor. However in many cases this is not enough. Imagine you would like one page to have a different layout, maybe two columns of text with an image below or maybe you would like to add a jQuery plugin which should be displayed only on one specific page. Due to that reason you can define a specific file for each page you would like to have a different look. Pages in WordPress have a page number which you can find out by editing a page and then looking at the URL. The URL should be something like http://www.example.com/wp-admin/post.php?post=2&action=edit. You can see that in this case the ID of the page would be 2. In order to have a unique look for that page you will have to create a file called page-2.php. Alternatively to the ID you can also choose the title of the page, so if the title of your page would be “Contact”, then creating a file page-contact.php will make WordPress choose this file for the contact page.
To better understand this, here an example: imagine we create a new page with the ID 2 and the title “Contact”. First WordPress will look for file called page-2.php or page-contact.php. If neither of these files can be found WordPress will look for a file page.php. This file should be the default file for your pages. In our case however we only have a file index.php so this is the last file WordPress chooses when it does not find a file page.php.
Now that you know how WordPress chooses which file to take for a post and page let´s duplicate our index.php file, save it as single.php and as page.php and upload it to your server. We will later in this tutorial adapt these files to change the layout and look of posts and pages.
Right now we have a front page and we can create new posts and pages but we can not yet change the content of our pages in WordPress. Let´s start from the very top of our website. The first thing we would like to be able to edit from within the admin section of WordPress is our navigation. If you are building a website for yourself and you know how to change the link text in your navigation within the header.php file then you don´t need to do this. However if you are building a website for a customer, the customer would like to be able to change the navigation link texts from within WordPress without having to edit the header.php file.
To create a customizable menu we need to create a new file functions.php and add it to http://www.example.com/wp-content/themes/lingulo/. In this file you can add all your custom functions for WordPress. In order for the navigation to be displayed in our admin section we need to initialize the menu. To do so we create a function register_menu() (or however you would like to call it). Inside this function we define the name of the menu and the theme location. A theme location defines at which position a menu should be displayed. You can also create multiple menus by using an array. Check this out for more information. The last step is to inizialize the function by using add_action( ‘init’, ‘register_menu’ ).
function register_menu()

{

register_nav_menu('main-nav',__( 'Top Main Navigation' ));}

add_action( 'init', 'register_menu' );
Open your header.php file and replace the list items from our main navigation with <?php wp_nav_menu( array( ‘theme_location’ => ‘main-nav’ ) ); ?>. This defines that at that position in our theme we want the Top Main Navigation to be positioned.
<nav>

<h2 class="hidden">Our navigation</h2>

        <ul>

<?php wp_nav_menu( array( 'theme_location' => 'main-nav' ) ); ?></ul>

</nav>
Now we can go to the admin section of WordPress and add a new menu. Go to Appearance -> Menus, type in a menu name and click on “Create new”. Select “Main Navigation” as theme location and adapt the menu according to your needs by adding or removing items and dragging them to change the order. Save the menu and it should be displayed just like before on your website.
Now that our menu is working the next step is creating posts for every content section and including them into the index.php file in order to be able to change the text from within WordPress. In order to make posts appear on our main page we need to use the WordPress loop. WordPress loops through our posts and displays them according to what parameters we add to the loop.
Let´s start with the content boxes on top of the image slider. Create a new post for each of the boxes (there are three different boxes) and add some text to it. As we don´t want the whole text to be added into the slider content boxes we put the cursor at the position in our text at which we would like the content to stop being shown and click on “more” in the WordPress editor toolbar (where you can set text to bold or add links). To make these posts appear on our website we need to use the WordPress loop. Since we don´t want to display all available posts, but only three specific posts (the three posts we just created) we need to define which posts should be displayed. One way to accomplish this is to add all posts we would like to be displayed in the slider to one category and then only loop through the posts of this category.
Go to Posts -> Categories and add a name (for example “Slider Posts”). If you would like to you can also choose a slug and add a description. Now click on “Add new Category”. The new category has been added and we can start adding our posts to that category. Open up each of your posts in the WordPress editor and choose “Slider Posts” from the Categories section on the right side. Then click on “Update”. Do this to all three posts you would like to appear as slider content on our website.
Well done, now we need to add some code to our index.php file so that WordPress knows that only the posts from our Slider Posts category should be displayed. Open up your index.php file and change your first section (the one with the class “container”) to this:
<section class="container">

<?php query_posts('cat=3'); ?>

    <?php $counter = 1; if ( have_posts() ) : while ( have_posts() ) : the_post(); ?>

<h2 class="hidden">Lorem Ipsum</h2>

        <article id="slider_content<?=$counter?>">

<h3><?php the_title(); ?></h3>

            <?php the_content(); ?>

            <a class="button" href="javascript:void(0)">Mehr lesen</a></article><?php $counter++; endwhile; endif; ?>

<?php wp_reset_query(); ?>

    <div id="slides">

<img src="<?php bloginfo('stylesheet_directory'); ?>/img/slide3.jpg" alt="Photo by: Mike Ranweiler Link: http://www.flickr.com/photos/27874907@N04/4833059991/">

        <img src="<?php bloginfo('stylesheet_directory'); ?>/img/slide2.jpg" alt="Photo by: Daniel Parks Link: http://www.flickr.com/photos/parksdh/5227623068/">

        <img src="<?php bloginfo('stylesheet_directory'); ?>/img/slide1.jpg" alt="Photo by: Missy S Link: http://www.flickr.com/photos/listenmissy/5087404401/"></div></section>
We use query_posts(‘cat=3’); to retrieve only the posts from category 3. You need to adapt the value 3 to whatever your category´s ID is (to find out go to the Edit Category screen of your category and look for tag_ID=3 in the URL. Whatever number there is would be the ID of your category.)
In the next line there are some things going on. if ( have_posts() ) : while ( have_posts() ) : the_post(); checks whether there are posts available and starts a while loop going through each post. We added a variable $counter before going in the loop and set it to 1. The reason for this is that our first article has the ID slider_content1, the second one slider_content2 and the third one slider_content3. We increase the counter by one each time we go through the loop. We then add this variable to the end of the ID like so: <article id="slider_content<?=$counter?>">. The next lines are self-explanatory, we print out the title and the content of our post. At last we increase the counter by one and end our while loop and if statement <?php $counter++; endwhile; endif; ?> and reset the WordPress loop by using <?php wp_reset_query(); ?>.
You have understood the basic concept of implementing a website into WordPress. Let me show you exemplarily how we could make a post from WordPress appear on our website even outside the loop. Say for example you would like the text next to the rocket and watch sign (“Dolor sit amet”) to be editable in WordPress. Since we want to show one single post which always remains the same and not a series of posts we don´t need to use the WordPress loop. To display the title of a specific post use <?php echo get_the_title(your_id); ?> where “your_id” should be the ID of the corresponding post. Remember you can find out the ID of a post by editing the post and looking for “post=your_id” in the URL. To display the content of a specific post use this snippet:
<?php

$post = get_post(your_id);

$content = apply_filters('the_content', $post->post_content);

echo $content;?>
You should now be able to implement a HTML5 website into WordPress. The next step is to adapt the files “single.php” which will be the page displayed when requesting posts and “page.php” which is used for WordPress pages. Be sure to check out the second part of this tutorial.

Your tips for html5 and these are really helpful for me in my development
Waiting for your next article.
Great information about the wordpress tutorial for beginner. It has all those basic information that is necessary for starter.
In addition to above you can also watch wordpress video tutorial of website template designing video
thanks to post is good… im from indonesia
Thanks For this post
Thank You for this code and explanation, It is clears my site…………
interesting article thanks
I follow your tips for html5 and I found that these are really helpful for me as well as the person who follows your tips.
Waiting for your next article.
keep sharing
This tutorial is great! I also own a WordPress site: http://www.convertforfree.com and this tutorial helped me a lot in building my site.
oh i like this article
nice contant
beautiful theme
Nice topic, Thank you
It’s really helpful, thanks
Really easy code to html5
Thanks for your post and your sharing
Superb tutorial to create a HTML5 responsive website
Its really awesome tutorial.
it is very helpful for us
thanks for post
thanks for this post
Very important
Thanks you so mush
Thank you a lot for sharing great sources of free responsive wordpress themes. All themes are really awesome and would like to use one.
I am waiting for more articles like this. I really like this.
Thanks for sharing.
thank you for discussing each and important topics, i need this
Great Post !
Thanks so much
Good work…unique site and interesting too… keep it up…looking forward for more updates.
Great post! Thanks for you insight and sharing it with us! I like this blog and I will be here again.
what this theme wp website http://www.hipwee.com i dont know
inbox me kingstoko46@gmail.com
nice,, Could you provide your created template files, so that I could see where mabe my mistake is.thanks
I don’t suppose anyone can help me. I’ve got all this working apart from the ‘figures’ section. Basically the DIV is stripped from the caption but it not replaced by the FIGURE tag using this on my site brightverge.com if you have time kindly check it. So basically the IMG is wrapped in a P tag instead which obviously isn’t right. Thanks.
Great post thanks for sharing dude 🙂
Fantastic tutorials. Written to be understood.
Thanks a lot 😀
Marco
I’m impressed, I have to admit. Seldom do I encounter a blog that’s both educative and interesting, and let me tell you, you’ve hit the nail on the head. The problem is something not enough people are speaking intelligently about. I am very happy I came across this in my hunt for something relating to this.
Thank you 🙂
Plzz, realse part 2 fast can’t wait….
Part 2 is already there 😉 Check it out here http://www.lingulo.com/tutorials/php/create-a-wordpress-html5-template-from-a-responsive-website-part-2
Okay … i got it. The css-file MUST lie in the same directory than the index.php!!
Hey Christoph!
I also get the error that the Lingulo Template is missing. I followed your tutorial step-by-step with your original files. What could be the reason? I’m doing it on my local xampp.
Could you provide your created template files, so that I could see where mabe my mistake is.
Thanks a lot!
Chris! I am waiting for part 2. Please!
Working on it right now, trying to finish it the next days…
Andre says:
Friday August 15th, 2014 at 02:47 AM
When I followed your instructions, for some reason WordPress tells me that the theme is broken for Lingulo:
Name Description
Lingulo Template is missing.
What could be wrong?
–same problem here. Any help?
Please continue to part 2. Your examples are of great help. They gave me that “oh, I didn’t know I can do that instead of this” feeling when developing sites.
look forward to your complete interpretation of this html5 site on to wordpress.
Thanx Again,
Art
Please continue with part two, this is so good!
Victor
When I followed your instructions, for some reason WordPress tells me that the theme is broken for Lingulo:
Name Description
Lingulo Template is missing.
What could be wrong?
My html 5 site has 3 style sheets for desktop, tablet and mobile. How do I load them in the wordpress theme? Only my style.css is currently loading on the site.
Great post! thank you very much. I successfully turned my site into a wordpress theme. I can’t wait for part 2!
Hey Chris,
It’s a great tutorial and I think it helps everyone who is trying to move his website to WordPress. Hopefully you will continue this great work in part two.
Alf
Hey Chris. Thank you for these most informative posts. I’m the luckiest man to have stumbled upon your site. This site has been my stomping ground ever since I came across it. I have learned a great deal from the wealth of information you presented here.
I have one important request to make: Could you kindly write a post on HOW TO CREATE A RESPONSIVE HTML5 Blogger template?
My joy will know no bounds if you could do something about this. Thanks.
Thank you :p
thanks
Why don’t go with the responsive creativity- means how to create a responsive website, and what actually the responsive website is? What are main css ideas require to create responsive website.
Hey! That’s great tutorial and please kindly keep it up Chris.I’m waiting for part 2
Great work man, thank you very much. Looking forward to part two.
Hi there,
I really like your tutorials.
About this one:
How about explaining some more about the functions.php?
Somehow I can’t get the menu to show up; only the code text shows up in the head of the website and WordPress panel… (check http://www.schenkz.nl/voorbeeld-pagina).
And could you also show how to change the slider images within WordPress?
I’m also anxious to learn how to create the exact single.php and php…
Thanx in advance! – Edwin –
I really like this tutorial.
I have been playing around with websites for quite some time and more and more folks are wanting a specific HTML template turned in to WordPress. This tutorial has helped a lot so far. Looking forward to part 2.
Thanks for all the work you do on this site!
Ray
Any part 2 on this one?
Is planned but I will wait for a few comments and some feedback to know what exactly I will write about.