


(Source)
Today, we are going to go to the backstage of HTML5 and discover how you can build an HTML5 video player from scratch. Before starting our journey, you should already be accustomed to HTML5 (to create the skeleton of the video player); CSS (to design and customize the player the way you want it), and JavaScript (to shape the behavior you want to give to your player) at an Intermediate level.
Nonetheless, the aim of this tutorial is to explain the code in such a manner that anybody is welcome to create their own personalized video player. So, without further ado, let’s dive in the secrets of creating a video player!
Create the document
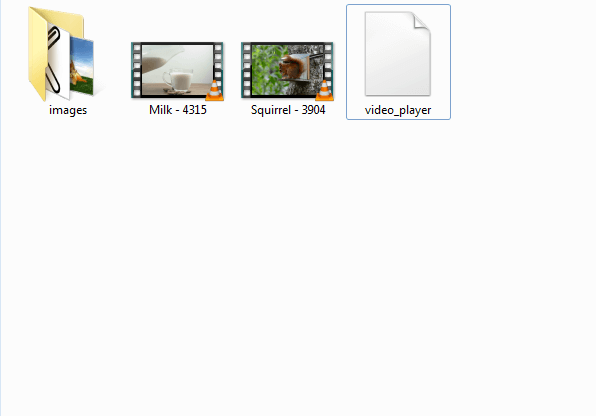
First things first, you will need to prepare your tools before starting your project. You will need:
- A blank .html document (this is where the code will work its magic);
- At least two videos (you can easily download some samples from free online sources, like PixaBay.com or Videezy.com to play with for this project); make sure they are both .mp4;
- A poster image (that would be a representative picture of your video). For this one, you can download a related image from other free online sources, like Pexels.com or FreeImages.com or you can take a snapshot via VLC (play the video, and then access Video -> Snapshot, and you’re all set);
- Icons for the controls of your player (again, you can access without worries websites like FlatIcon.com or IconArchive.com).
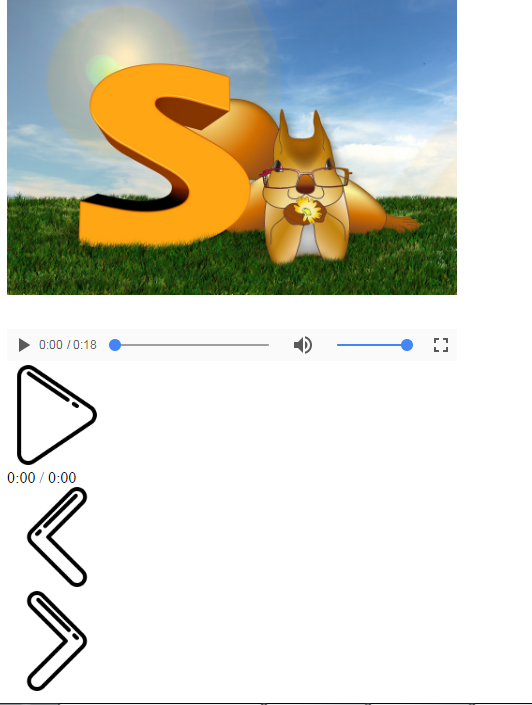
So, the result should look something like this:
For my tutorial, I will use:
- Pouring milk into a bottle and a squirrel in nature from PixaBay.com;
- A squirrel poster from PixaBay.com also;
- Media Mega Pack Outlined from FlatIcon.com;
- the FontAwesome to style up the video player;
- and finally, the Brackets code editor which is also free as I was attracted by the user-friendly “Live Preview” button in the top right corner, that shows you the result of your work in a web page after you make sure you save the edited .html file.
All these are free resources, so unless you want your video player to look a whole lot different, you can easily use the above resources for your own test of my tutorial.
Now that we’ve selected and gathered all the tools we need, we can finally go ahead and work on the code.
Embed your Video in a web page
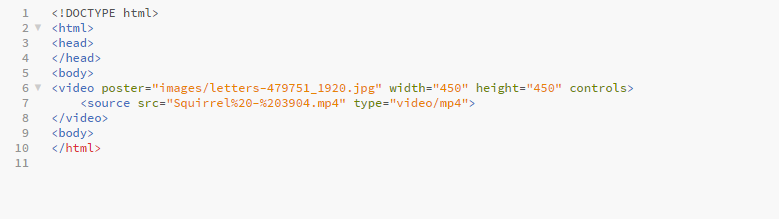
This is the basic HTML5 skeleton of your future video player. It uses 10 primary code lines that will enable your video to be displayed on any web page with some basic buttons to control it.
You will start by marking the HTML version that you are using with the universal doctype declaration <!DOCTYPE html> . This is the first thing with which you start any of your HTML documents so that your browser can be aware of what kind of document you are using.
Continue with opening up the script with an HTML tag, and close it with the usual </html>. Move on to the elements that you should include in the HTML format: head tag and the body tag.
Now we should focus on what goes around in the body tag. You can’t create a web video without the video element. So, inside the head tags, you insert the tag video and also don’t forget to insert the closing tag.
Now, within the video tag, you should state which dimensions your video player should have (it is recommended to set the dimensions for your video player to avoid flickering). The source of the video you want to play in your player and the poster picture that is representative of your video and which the viewers will see before hitting the “Play” button.
So, that being said, let’s take one attribute by one and see how it works.
The poster attribute is the one you need to create the representative image of your video. Inside it, you should name the folder of the picture (in this case, “Images”) and the name of the image. Next, up, you choose the width and height for your player, and I chose to go with a perfectly symmetric shape.
It’s very important to insert the boolean attribute “controls”. Without it, you can control your video only with a right click and then select “Play” or other basic functions. The controls tag will display a basic array of controls: Play, Pause, Volume and Maximize button for a more user-friendly feature.
Next up is the source tag, where you specify which is the source of your video with the src tag. As you’ve already created the folder for your video player, your video source will be easy to get recognized by your code just by inserting the name of your video file.
As there are three supported video formats for the <video> element: MP4, WebM, and Ogg. You should state what kind of video you are using with the type attribute. It is recommended to insert as many versions of your video as possible, for a better user experience. So, if you also have a .ogg version of your video, you should open another source tag under the .mp4 format, like this: <source src=”videoexample.ogg” type=video/ogg>.
Now, if you click the “Video Preview” button, you should see a basic web video player with a poster, control buttons and your video playing perfectly within a frame of your selected dimensions.
We enter the CSS area to layout the video player
Your video player will be contained in a huge div tag. That will have two other subsets of div tags.
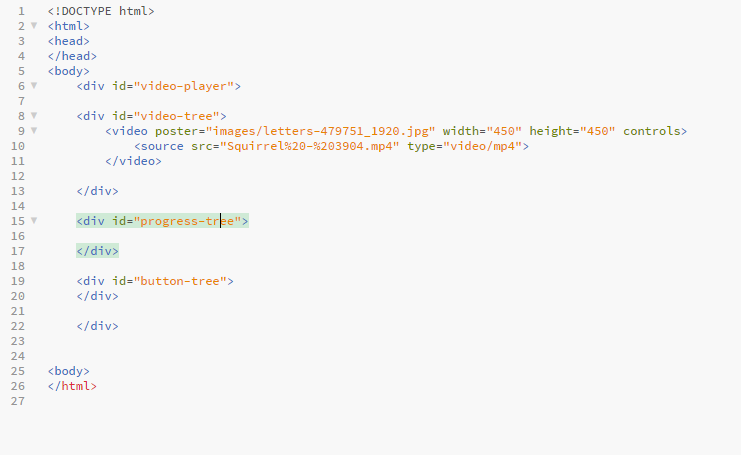
Next up, we are going to build the playground for the CSS code. For this, I’ve created three div ids, inside a larger div tag named video-player, as this is the goal of our project.
The first div tree is responsible for our video skeleton. In this section, you only have to move the initial lines within the video tag that we’ve created in the second step of the tutorial.
The second div tree handles the progress bar, while the third tree will be in charge of the buttons of your video player.
Remember that every div tag should be marked with a unique id.
Next, up, I just personalized each div with its required attributes.
So, the Video-tree div has the video tags in it – this is easy.
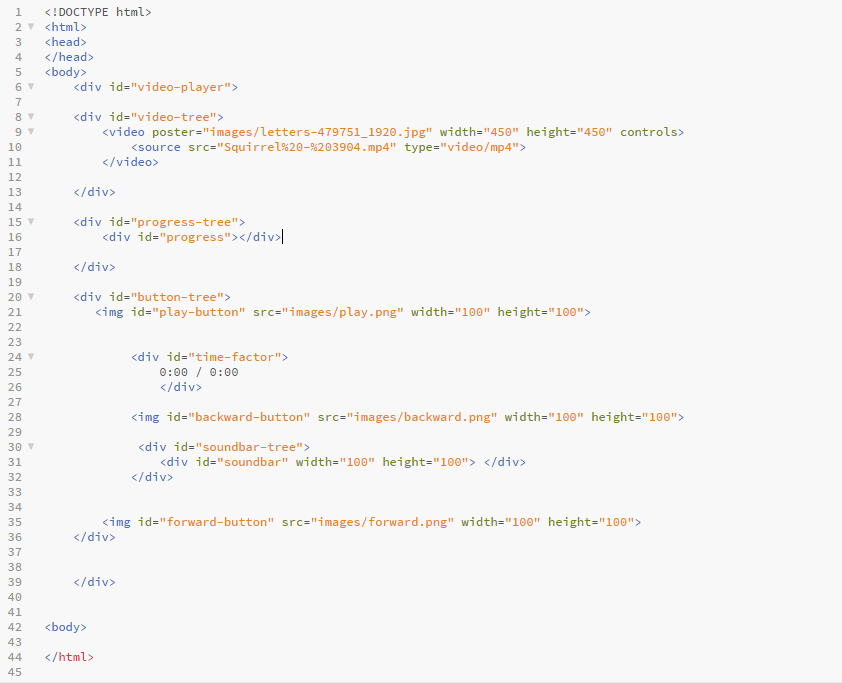
The progress-tree div is in charge with the progress bar, and that is why it has the “progress” id.
The button-tree div, however, requires more of your attention. I’ve inserted three buttons: play, backward and forward. So, each button is enclosed in its own div tag, has its own id (“play-button”; “backward-button” and “forward-button”), and their own dimensions (I chose 100×100 for each).
The play button though has its own time-bar, which I inserted with another set of div tags, with the “time-factor” id. Don’t forget to also insert the time limits “0:00/0:00” which represent the start time and the point in time the video has reached.
After all these, your “Live Preview” should look like:
So you see, the buttons are in the completely wrong order, but we’ll fix this up with the CSS code.
Style the video player
Save your .html file and open a new file named “video-player.css”. Don’t forget to save the .css file in the same folder as your .html work.
Now, go back to the .html file and add in the head tag the attributes that will link the .html file to your .css file as follows: <link rel=”stylesheet” type=”text/CSS” href=”video-player.css”>
Whatever structure you want to work within the .css file, you simply name the feature with the id you marked it in your .html file starting with #, and this is how you tell your code editor which part you want to style first.
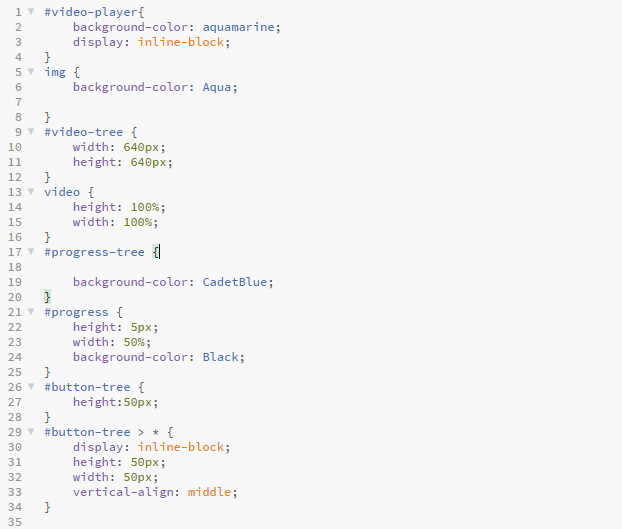
Above is the print screen of the .css file. I tackled basic features of CSS code, but this language can design your video player in more complex ways. As long as you have the basics, you can easily research for more complex styles on your own.
Now, I took each of the elements of the player one by one and customized it in the .css file.
For the video player color palette I chose different hues of blue to differentiate its main elements.
The video player has an aquamarine blue, which was restricted to the limited display of the player with the “inline-block” function. This way, your web page won’t get entirely blue, but it will be limited to the player itself.
The next element to design is the video-tree for which I chose the desired dimensions and commanded the video to display 100% on the entire frame of the video-tree.
For the progress-tree, I only selected the color, while focusing more on its own branch: “progress” which determines the progress bar. You should choose another color for the progress bar than the progress-tree, so as the viewers can see how much of the video is left.
Now, for the button-tree, I created two different entries. The first entry focuses solely on the width of the buttons. The second entry commands the buttons to be horizontally rearranged with the “display: inline-block” command, and is centered with the “vertical-align: middle” attribute.
These basic .css functions will give you the freedom to personalize the video player the way you want it.
Create functionality with JavaScript
At this stage, you should again save your work up till now and create a new code file and name it “video-player.js”. Save it in the same folder you used for this project.
Then, link the JavaScript file to the source HTML5 file, with a line between the link tag and closing head tag, like this: <script type=”text/javascript” src=”video-player.js”> </script>. This means opening up a script tag and specify the type of the script, which in this case is text/javascript, and the source of the file, which is the name you gave to your JavaScript file.
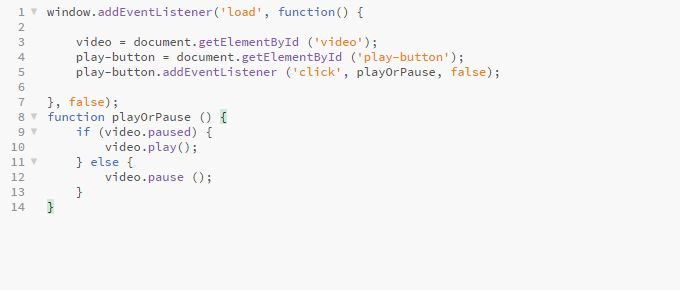
In the JavaScript code lines above, I’ve focused on the play button alone, as you can from here on research the functionality of backward and forward buttons on your own.
So, we’ll first introduce the elements’ id that we want to work with first. In this case, the “play-button” ID. Then, you should attribute a form to the button through the document GetElementbyID, and its JavaScript corresponding command is “play-button”.
Then, we’ll create a “Click” event with the addEventListener whenever the viewer clicks the button play. The function “playOrpause” will make the “play” button act as a regular play button as well as a pause button.
Then you will animate the playOrPause function. So, if the video is paused, clicking the button will activate the video. If it is not paused (marked with JavaScript code “else”), clicking the Play button will make the video actually play.
This sum up the basic steps you need to take in creating your own video player. You are welcome to share your own experiences and thoughts regarding the creation of a video player in the comments below!

[…] View / Download […]
It is not working. I tryed it without backward or rew, just to minimalize design. At the end : css and script don’t ‘see’ the video strip :).
thanks for this article..html 5 is very polular and it’s video function is also popular..